
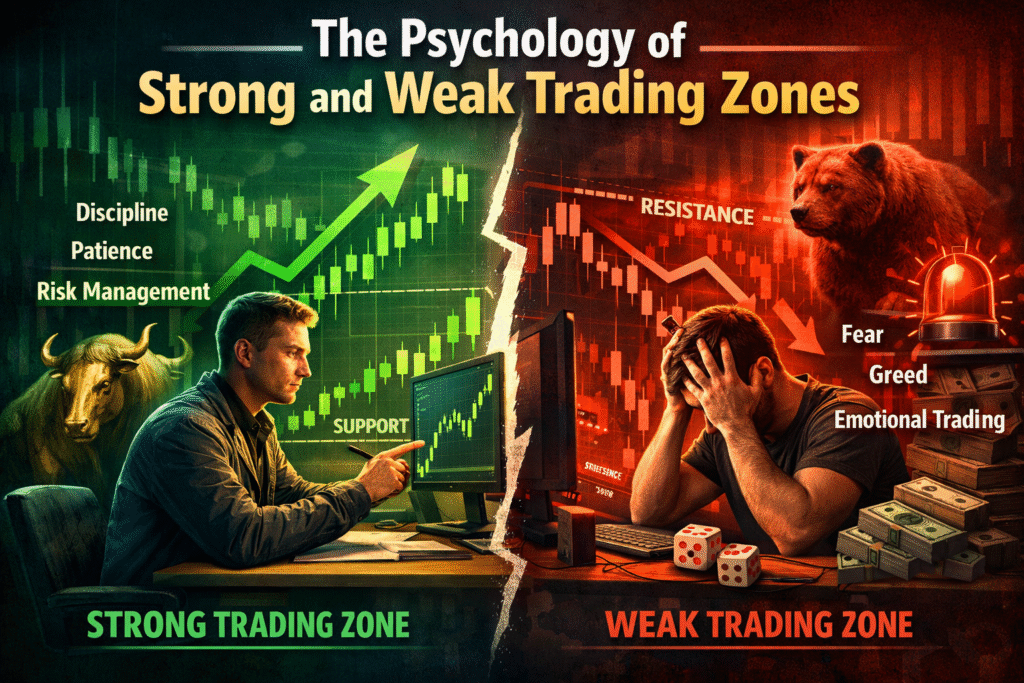
Understanding Strong and Weak Supply–Demand Zones
Identifying strong and weak supply–demand zones plays a vital role in supply and demand trading. In technical analysis, these zones are typically formed from price structures such as rally–base–rally or drop–base–drop patterns. While this concept may seem simple at the beginning, mastering it requires deeper study and continuous refinement. As traders gain more experience, they begin to apply advanced techniques to improve accuracy and decision-making.
In this article, we will explore how to distinguish between strong and weak supply–demand zones. Understanding this difference not only improves trade selection but also helps in managing risk more effectively. For instance, traders may allocate larger risk exposure to high-probability zones, while reducing risk in areas considered weaker. This approach allows for more structured and disciplined risk management.
How to Identify Strong and Weak Supply–Demand Zones
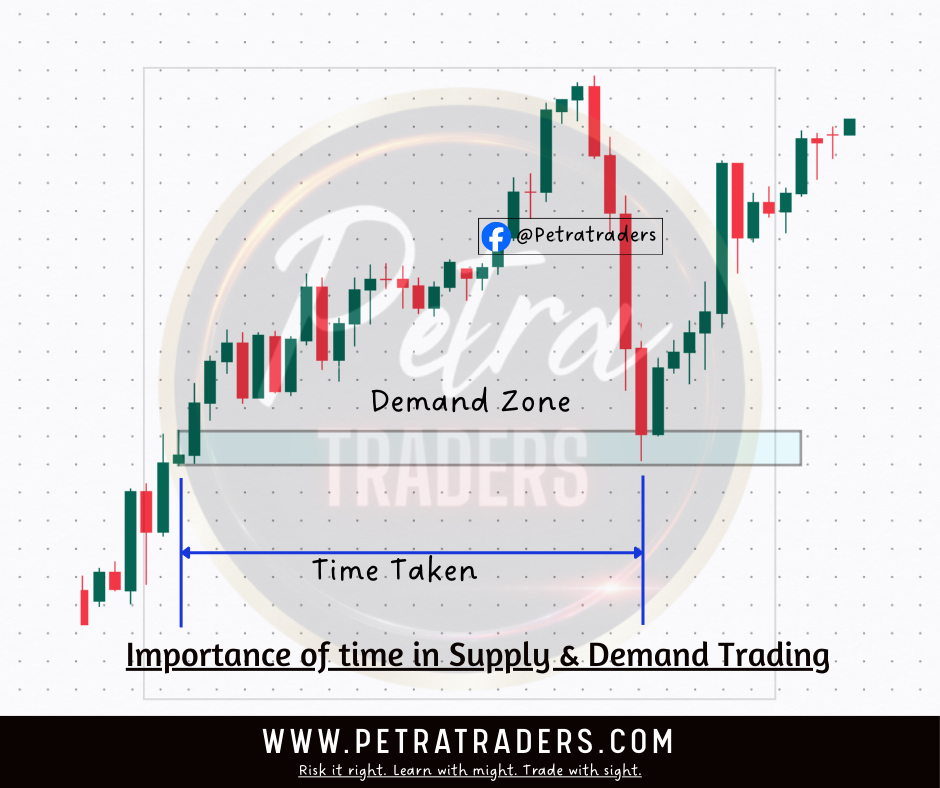
There are several methods traders use to evaluate the strength of supply and demand zones on a candlestick chart. One approach involves combining additional technical tools such as Fibonacci retracement levels, moving averages, or pivot points to create confluence. Another method focuses on analyzing price behavior, including the number of candles and the time spent within the zone.
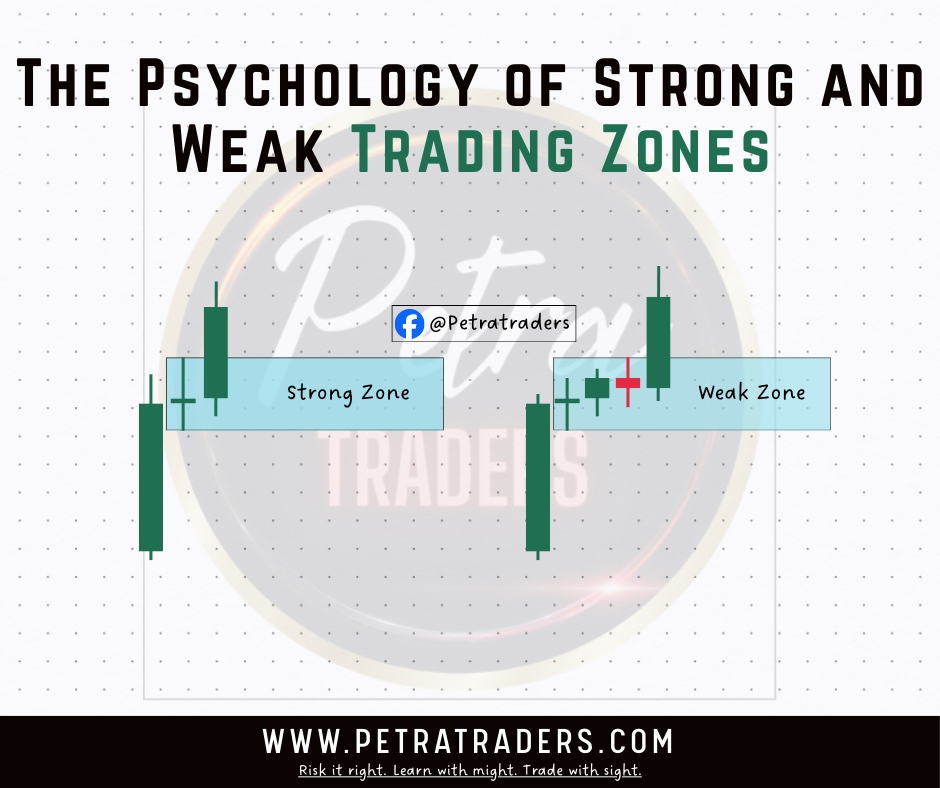
Key Characteristics of Supply–Demand Zones
| Strong Supply/Demand Zones | Weak Supply/Demand Zones |
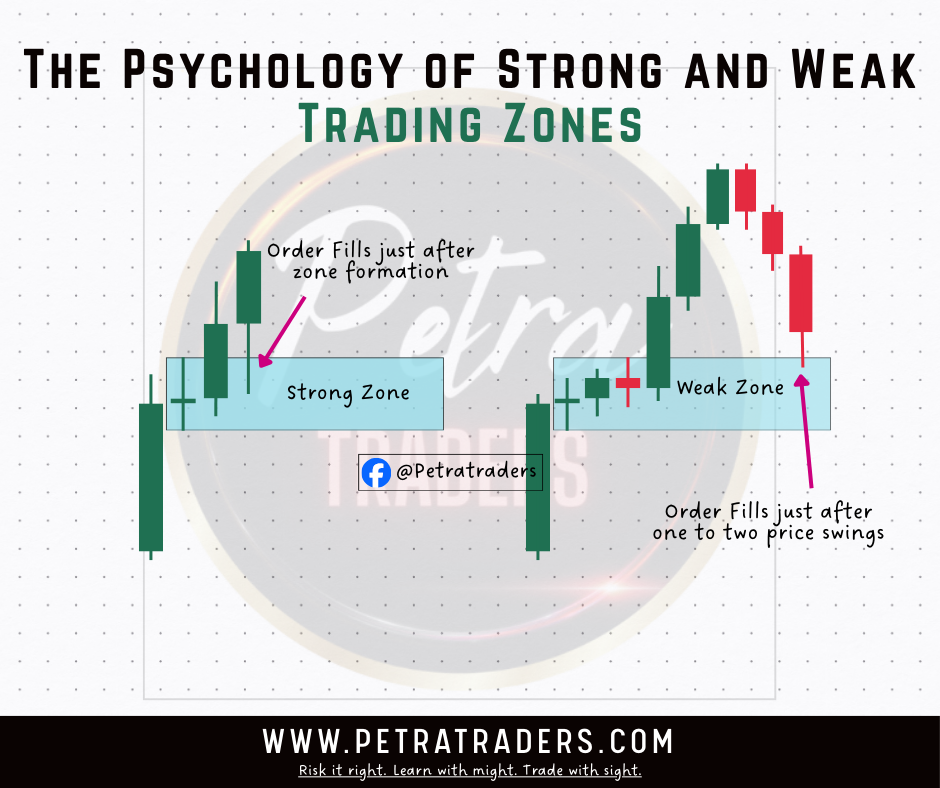
| Price revisits the zone shortly after it is formed | Price returns only after one or more major price swings |
| Base structure contains only one or two candlesticks | Base structure consists of more than two candlesticks |
| Zone forms near high-probability areas such as the Fibonacci golden zone | Zone forms away from key Fibonacci levels |
| Often aligns with important pivot points | Lacks confluence with major technical levels |
| Shows strong imbalance between buyers and sellers | Indicates hesitation and reduced market participation |
| Price moves away from the zone aggressively | Price reacts slowly or weakly from the zone |
Understanding these differences helps traders visually separate high-quality zones from those with lower probability.
The Psychology behind Strong and Weak Zones
Market psychology plays a major role in explaining why some zones perform better than others. Every price pattern reflects the actions and decisions of traders operating behind the scenes. By understanding this psychological behavior, traders can make clearer and more confident decisions during live market conditions.
A strong zone usually forms when institutional orders are executed quickly. This is often seen when price leaves the base aggressively after only one candle, indicating strong imbalance between buyers and sellers. In contrast, a weak zone forms when price lingers in the area, creating multiple base candles. This hesitation suggests uncertainty and reduced order flow, which lowers the probability of a strong reaction later.
In simple terms, the faster price reacts after a zone is created, the stronger that zone tends to be.
How to Use Strong and Weak Zones in Risk Management
Strong and weak supply–demand zones can be powerful tools for managing trading risk. When a high-quality zone is identified, traders may choose to risk slightly more per trade because the probability of success is higher.
On the other hand, when trading weaker zones, it is wiser to reduce exposure since the likelihood of price reacting cleanly is lower. By adjusting risk based on zone quality, traders can protect their capital while still taking advantage of market opportunities.
This method promotes consistency and helps prevent emotional or random risk-taking.
Filtering Strong Zones from Weak Ones
One effective way to separate strong zones from weaker ones is by using a supply and demand indicator. Many indicators allow traders to customize settings such as the number of candles allowed in a zone or the size of the base structure. These parameters can be optimized through back testing to match individual trading strategies.
Using such tools helps maintain objectivity and reduces subjective decision-making when marking zones on the chart.
Final Thoughts
For anyone practicing supply and demand trading, learning to differentiate between strong and weak zones is essential. This skill improves trade accuracy, strengthens risk control, and enhances overall trading performance.
To truly master supply and demand trading, traders should continue studying related concepts and refining their approach through experience and analysis.
📊 Stay Updated with Petra Traders
Visit www.petratraders.com
⚠️Disclaimer: This content has been rewritten for educational purposes and should not be considered as financial advice. Always do your own research before making trading or investment decisions.
#SupplyAndDemand #SupplyDemandTrading #TradingZones #MarketStructure #ZoneTrading #PetraTraders #Education